Painted Rock Hobbit Hole.
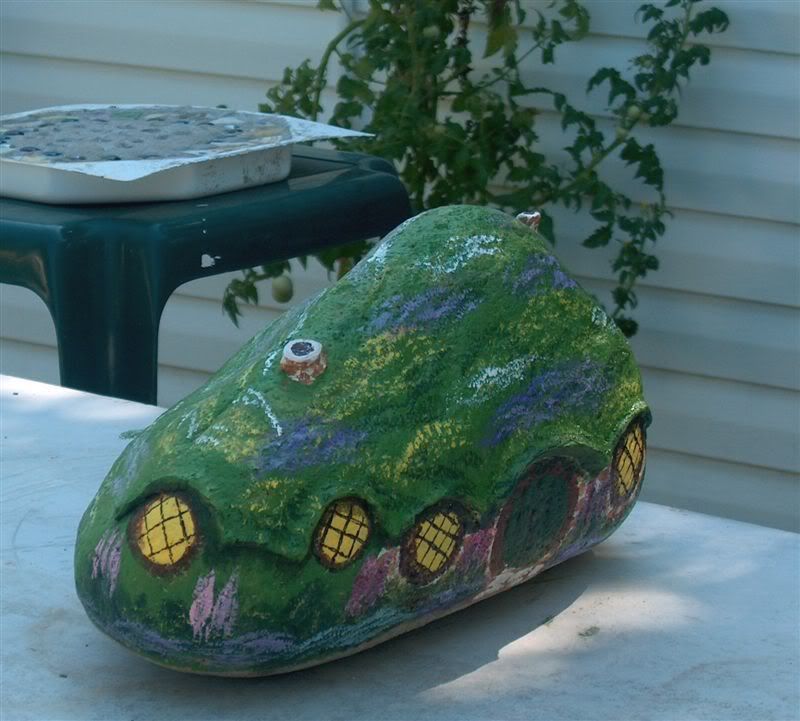
Aug. 21st, 2007 08:06 pmI've been painting rocks to look like hobbit holes, and my latest one is pretty big--a little over a foot long, weighing about 20 pounds. Anyway, I documented the process, which I adapted from Lin Wellford's books on painting rocks.
(Click on the thumbnails for a closer look.)
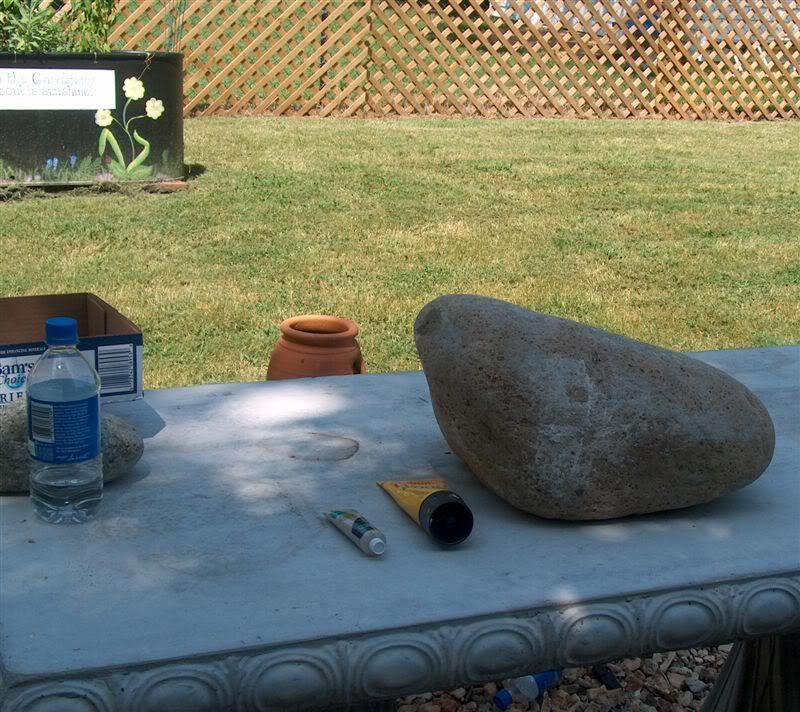
I start with a rock that is more or less rounded in shape. It could be as small as, say, an egg, up to as big as this one. Most of the ones I do are more or less the size and shape of a baking potato.

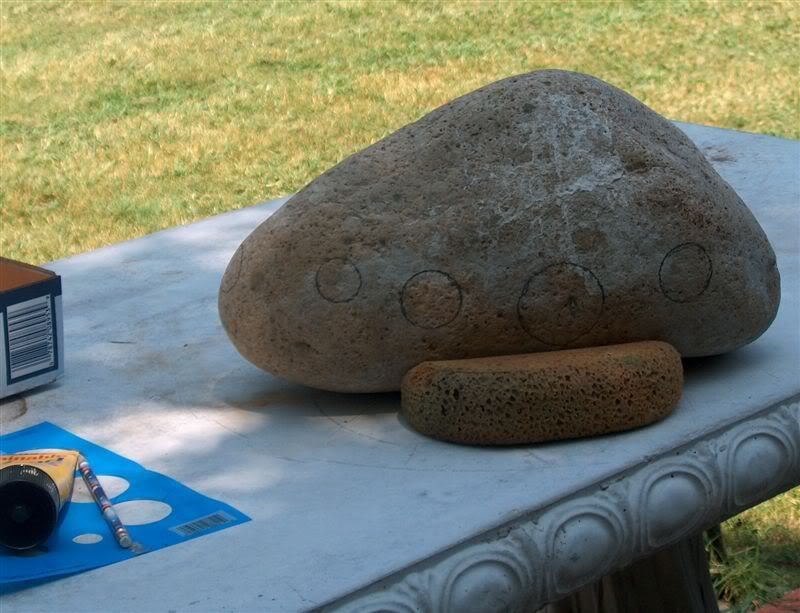
Then I pencil in the location of the windows and doors--round, of course!

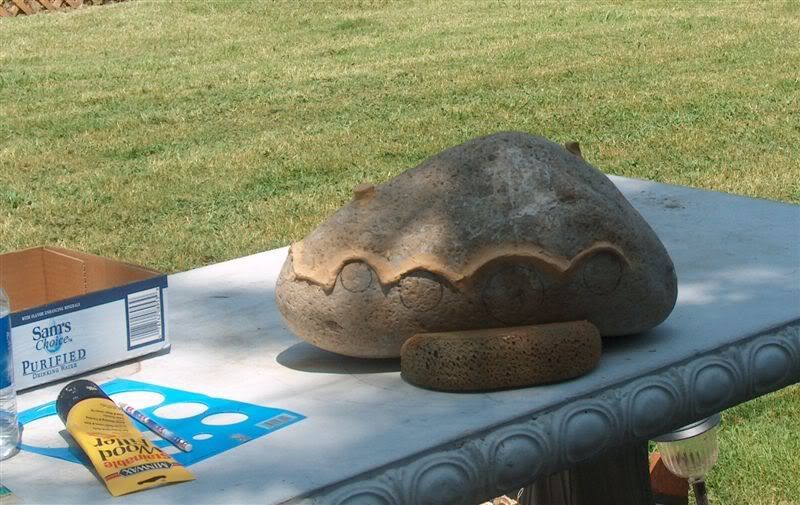
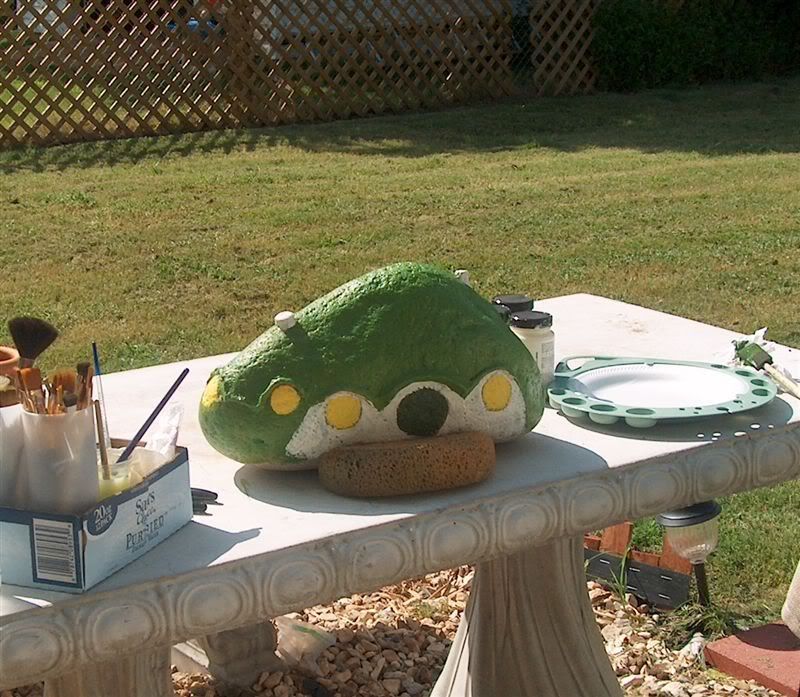
Next, I use wood-filler in a tube to add the "eaves" and make the "chimneys". I apply the wood-filler much like one would apply decorator's frosting to a cake. The sponge in the front is just to prop the rock at a good angle to work with, as this one was too heavy for me to pick up.


Then I do some basecoating with outdoor acrylic craft paint. I use either Folklore Outdoor, or Patio Paint.


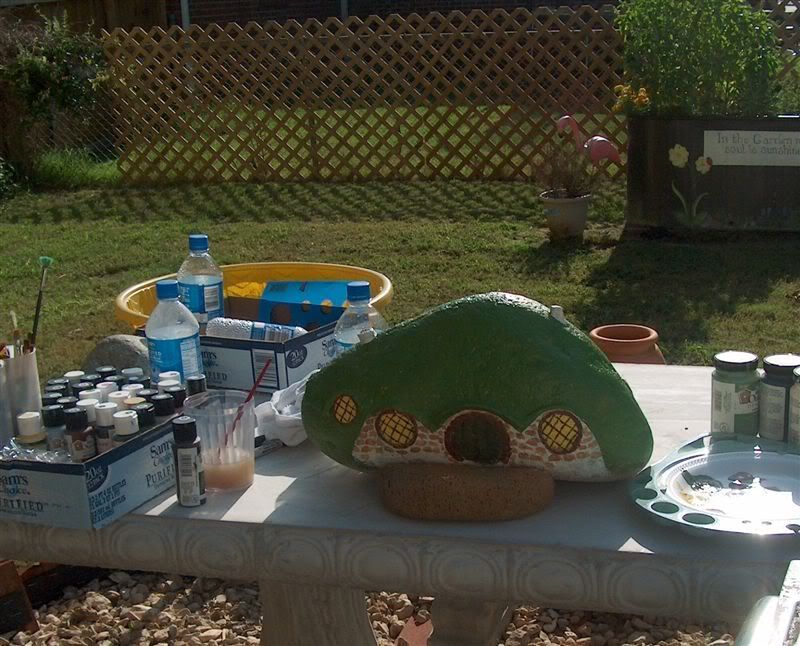
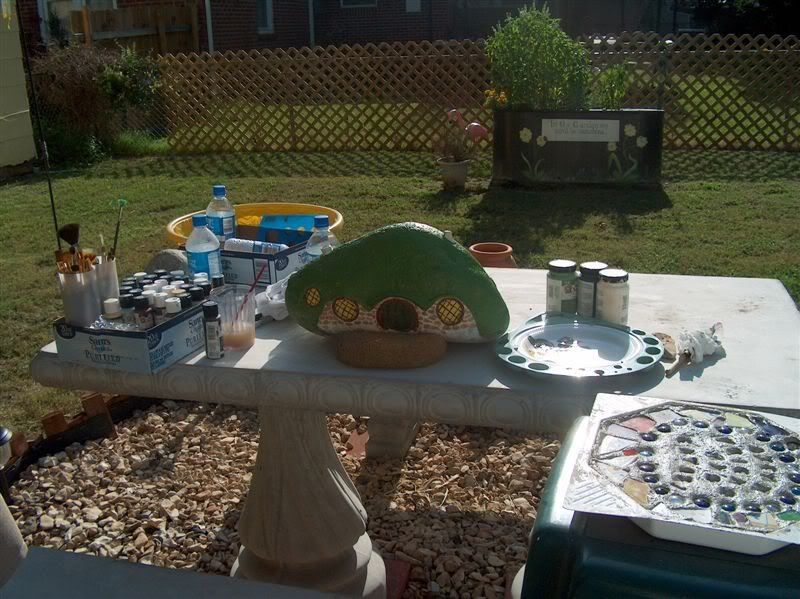
Next I add a few details to the windows and doors. I used a black sharpie to draw in the window panes, and I get the effect of planks on the door by side-loading the paintbrush on one side with green and on the other with a dark brown. I add a bit of "stones" and "brickwork" details.


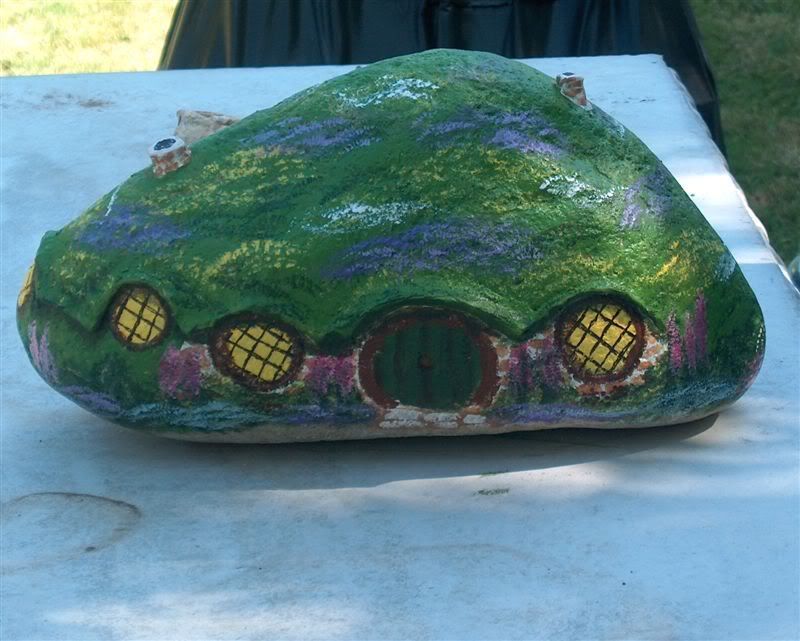
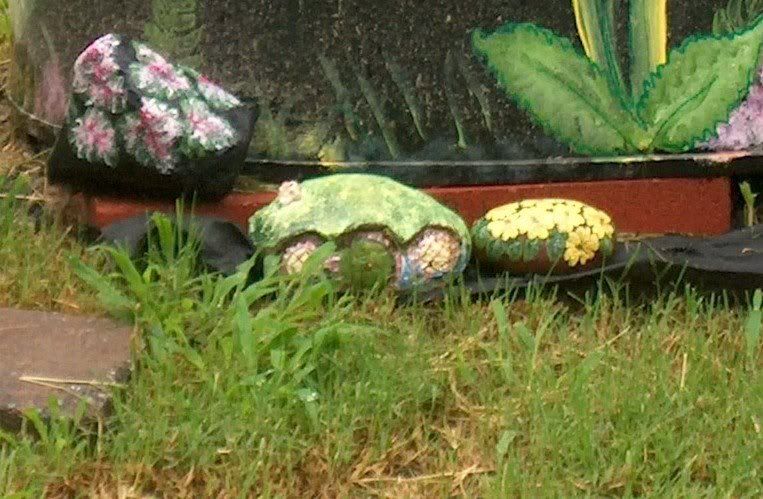
I use both a "scrubby" brush and a fan brush, to dab on the shrubbery and flowers, all around the bottom of the smial, and also a few flowers on top of the hill.


Because this one was so large, I also put some flowers on the "back" of the hill, as well. On the smaller ones, I don't usually do this.

Here it is in the grass, next to my planter garden. But when our new front porch is finished, it will have a new location in the front of the house.


Here are a few other rocks I've done.
Here's the cottage at Crickhollow!

And here are a couple of smaller and more traditional smials…


(Click on the thumbnails for a closer look.)
I start with a rock that is more or less rounded in shape. It could be as small as, say, an egg, up to as big as this one. Most of the ones I do are more or less the size and shape of a baking potato.
Then I pencil in the location of the windows and doors--round, of course!
Next, I use wood-filler in a tube to add the "eaves" and make the "chimneys". I apply the wood-filler much like one would apply decorator's frosting to a cake. The sponge in the front is just to prop the rock at a good angle to work with, as this one was too heavy for me to pick up.
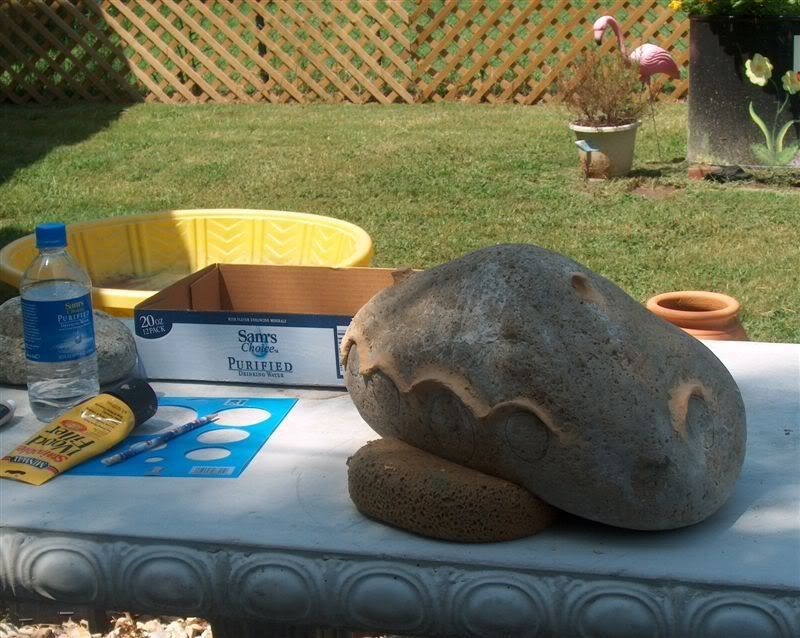
Then I do some basecoating with outdoor acrylic craft paint. I use either Folklore Outdoor, or Patio Paint.

Next I add a few details to the windows and doors. I used a black sharpie to draw in the window panes, and I get the effect of planks on the door by side-loading the paintbrush on one side with green and on the other with a dark brown. I add a bit of "stones" and "brickwork" details.
I use both a "scrubby" brush and a fan brush, to dab on the shrubbery and flowers, all around the bottom of the smial, and also a few flowers on top of the hill.


Because this one was so large, I also put some flowers on the "back" of the hill, as well. On the smaller ones, I don't usually do this.
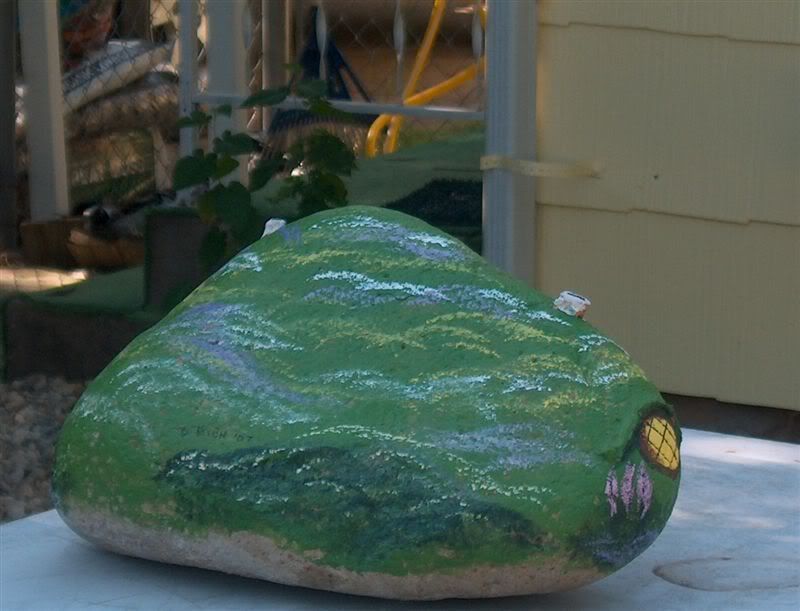
Here it is in the grass, next to my planter garden. But when our new front porch is finished, it will have a new location in the front of the house.

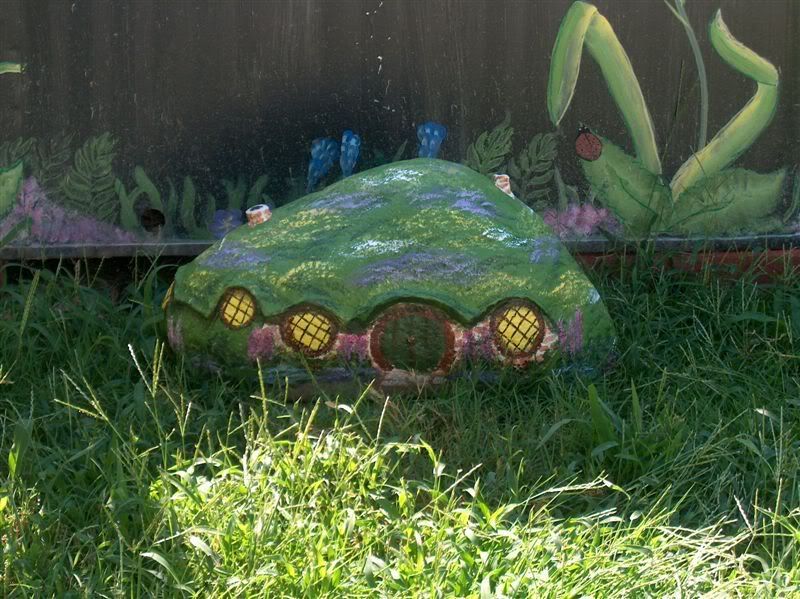
Here are a few other rocks I've done.
Here's the cottage at Crickhollow!
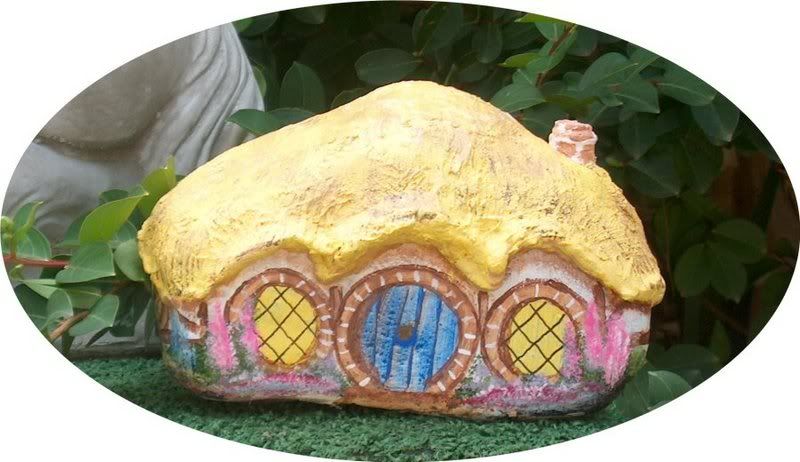
And here are a couple of smaller and more traditional smials…

no subject
Date: 2008-01-28 09:54 pm (UTC)Or --- I do a changing floral display for the planter inside my front entrance. Maybe that would be a good place! Last year I completely changed the spring/summer display from flowers to a stream with a dragon swimming in it. Maybe it's time to change out the fall display... Hmmm...